A small puddle at the base of the toilet is easy to dismiss the first time you notice it — maybe it’s condensation, maybe someone splashed during cleaning. But water that keeps returning around the base of a toilet is almost always a sign of an underlying seal or connection failure, and left unaddressed, it can quietly damage flooring, subfloor, and even ceiling structure below. The good news is that base leaks come from a short, predictable list of causes, and diagnosing which one applies is usually straightforward with a little patience.
In this guide
Common causes of a base leak · Why it’s often condensation, not a leak · The risks of ignoring it · How to diagnose the source · Step-by-step repair · When to call a plumber · FAQ
Common Causes of a Base Leak
Water appearing around the base of a toilet almost always traces back to one of a few specific sources:
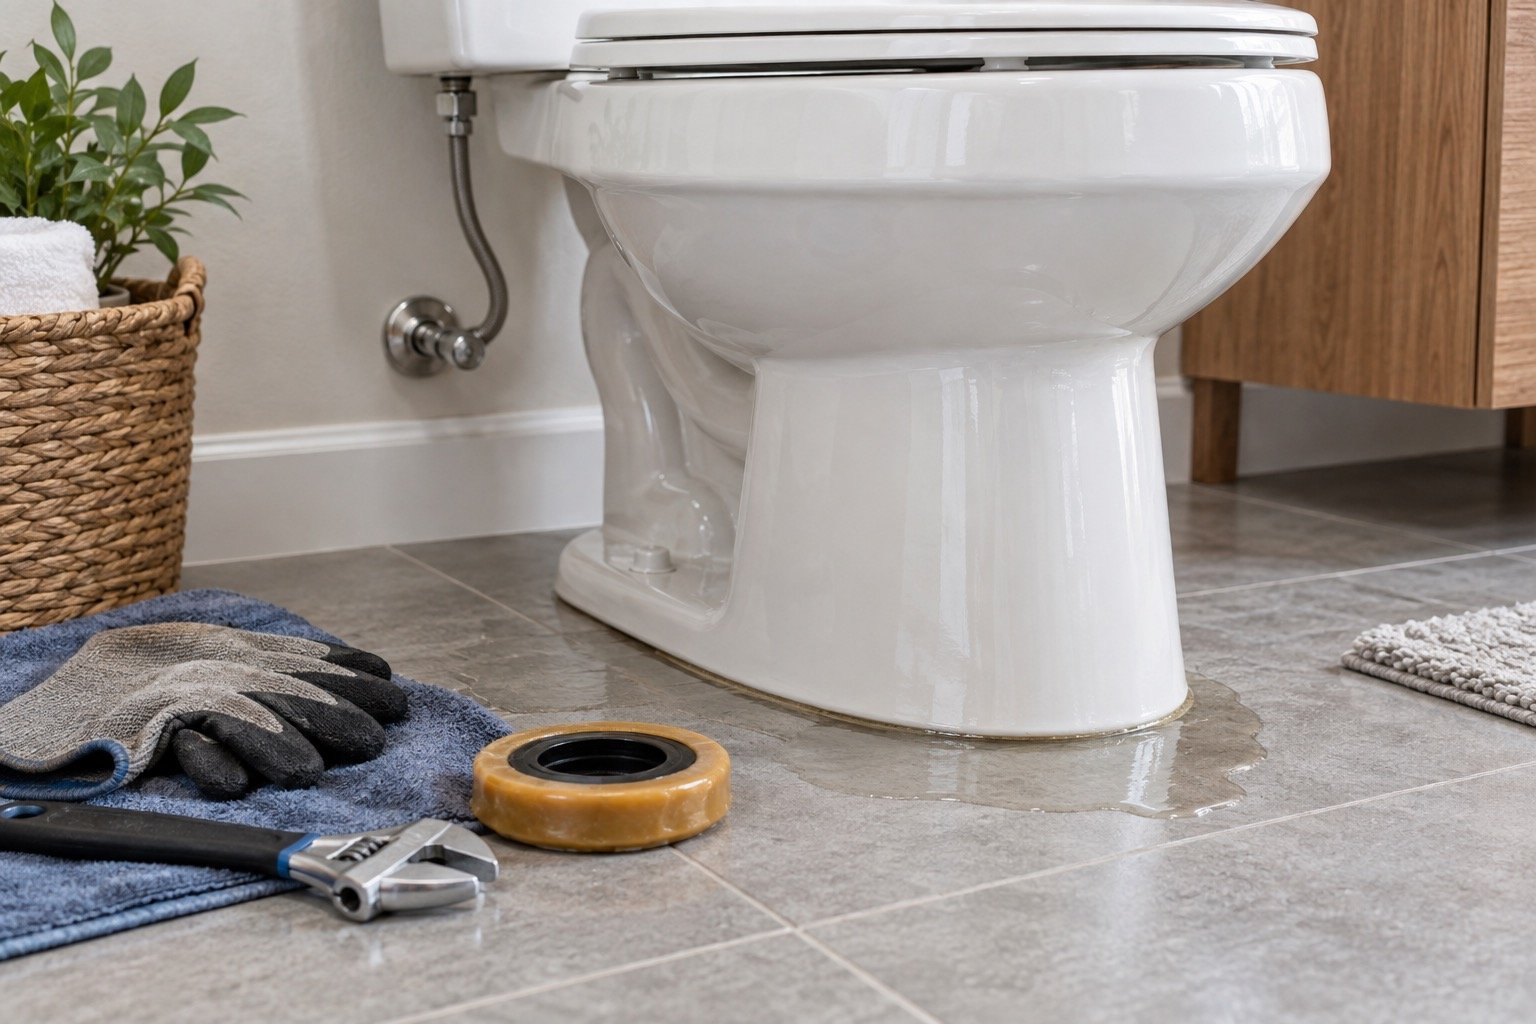
Failed wax ring: The wax ring seals the connection between the toilet base and the drain flange in the floor. Over time, or if the toilet has ever rocked or been removed and reset, this seal can break down and allow water to seep out with every flush.
Loose closet bolts: If the bolts holding the toilet to the floor loosen, the toilet can rock slightly with use, which gradually breaks the wax ring seal even if it started out intact.
Cracked tank or bowl: A hairline crack in the porcelain, often invisible until water pressure forces moisture through it, can leak steadily or only during a flush cycle.
Damaged or corroded supply line: The water supply line and its connection to the fill valve can leak at the base, which looks similar to a wax ring failure but comes from an entirely different source.
Damaged flange or subfloor: If the drain flange is cracked, sitting too low, or the surrounding subfloor has already deteriorated, no amount of wax ring replacement will fully solve the leak until the underlying structure is repaired.
Is It a Leak, or Just Condensation?
Before assuming the worst, it’s worth ruling out condensation, which is a much simpler and more common explanation, especially in humid climates or during seasonal temperature swings. Condensation forms when cold water inside the tank causes moisture in the surrounding air to collect on the tank’s exterior surface, which then drips down and pools at the base — mimicking the look of a seal failure. Condensation typically appears as a light film across the entire tank surface rather than water rising specifically from underneath the bowl, and it tends to worsen with humidity rather than with each flush. Wiping the tank dry and checking whether moisture returns within an hour, unrelated to flushing, is a simple way to tell the two apart.
Quick tell: Condensation dampens the outside of the tank and drips down the sides. A seal or connection leak produces water specifically at the point where the bowl meets the floor, and it often gets worse right after a flush.
The Risks of Ignoring a Base Leak
A slow leak at the base of a toilet is easy to underestimate because the visible amount of water often looks minor. The real damage usually happens out of sight: water can seep into subfloor material, causing it to soften, warp, or rot over time, which weakens the structural support beneath the toilet itself. In multi-story buildings, prolonged leaking can eventually damage the ceiling of the room below. Standing moisture also creates ideal conditions for mold growth, both in the subfloor and around the base of the toilet, which can affect indoor air quality and is considerably more expensive to remediate than the original leak would have been to fix.
How to Diagnose the Source
Working through the possibilities in order helps narrow down the cause without unnecessary guesswork:
1. Check for rocking. Place both hands on the seat and gently rock the toilet side to side. Any movement suggests loose bolts or a compromised wax ring seal.
2. Dry everything and watch after a flush. Wipe the base, tank exterior, and supply line connection completely dry, then flush and observe where moisture reappears first.
3. Inspect the supply line connection. Water appearing near the connection at the wall, rather than under the bowl itself, usually points to the supply line or fill valve rather than the wax ring.
4. Look closely at the porcelain. Run a hand along the tank and bowl surface feeling for a hairline crack, particularly if water appears only during or right after a flush cycle.
Step-by-Step Repair: Replacing the Wax Ring
If diagnosis points to a failed wax ring, which is the most common cause of a base leak, the repair follows a fairly standard sequence:
1. Shut off the water supply at the valve behind the toilet, then flush to empty the tank and bowl as much as possible.
2. Disconnect the supply line and remove the nuts from the closet bolts at the base.
3. Lift the toilet off the flange carefully and set it aside on an old towel or cardboard to avoid damaging the floor or the toilet itself.
4. Remove the old wax ring and inspect the flange for cracks, corrosion, or improper height relative to the finished floor.
5. Install a new wax ring centered on the flange, then carefully lower the toilet back into place, pressing down evenly to compress the seal without twisting it.
6. Reinstall the closet bolts and supply line, tighten evenly on both sides to avoid cracking the porcelain, then restore water and check for leaks after several flushes.
Important: If the flange itself is cracked, sitting below the finished floor level, or the subfloor underneath feels soft when pressed, a wax ring alone will not resolve the leak — the underlying flange or subfloor issue needs to be repaired first.
When to Call a Plumber Instead
Replacing a wax ring is a manageable DIY project for most homeowners with basic tools and patience, but certain situations call for professional help: a cracked or corroded flange that needs replacement, visible subfloor damage or soft spots around the toilet, a cracked tank or bowl that requires full toilet replacement, or a leak that returns shortly after a wax ring replacement, which often signals a problem beyond the seal itself. For rental properties, multi-unit buildings, or commercial restrooms, involving a licensed plumber also helps ensure the repair meets any applicable code requirements and won’t be flagged during a future inspection.
Frequently Asked Questions
How long does a wax ring typically last?
A properly installed wax ring can last many years without issue, but its lifespan shortens considerably if the toilet is ever rocked, loosened, or removed and reinstalled without replacing the ring.
Can I just tighten the bolts instead of replacing the wax ring?
If the toilet is rocking due to loose bolts but the wax ring is still intact, tightening can resolve the issue. However, if rocking has occurred for any length of time, the wax ring has likely already been compromised and should be inspected or replaced as well.
Is it safe to keep using a toilet that’s leaking at the base?
It’s best to address the leak as soon as possible rather than continuing normal use, since every flush during that time allows more water to reach the subfloor. If a repair can’t happen immediately, minimizing use and placing towels around the base can limit damage in the short term.
Final Thoughts
A toilet leaking at the base is rarely a mystery once you know what to look for — in most cases, it comes down to a failed wax ring, loose bolts, or a supply line connection, all of which are identifiable with a quick inspection and fixable without major expense. The real cost comes from waiting: subfloor damage and mold remediation are far more disruptive and expensive than a wax ring replacement caught early. A methodical check of rocking, drying and observing after a flush, and a close look at the porcelain itself is usually all it takes to find the source and get it fixed before it spreads further.